WebGPU Recipes
@nativescript/canvas supports webgpu context creation with web-style setup flow.
Visual output preview
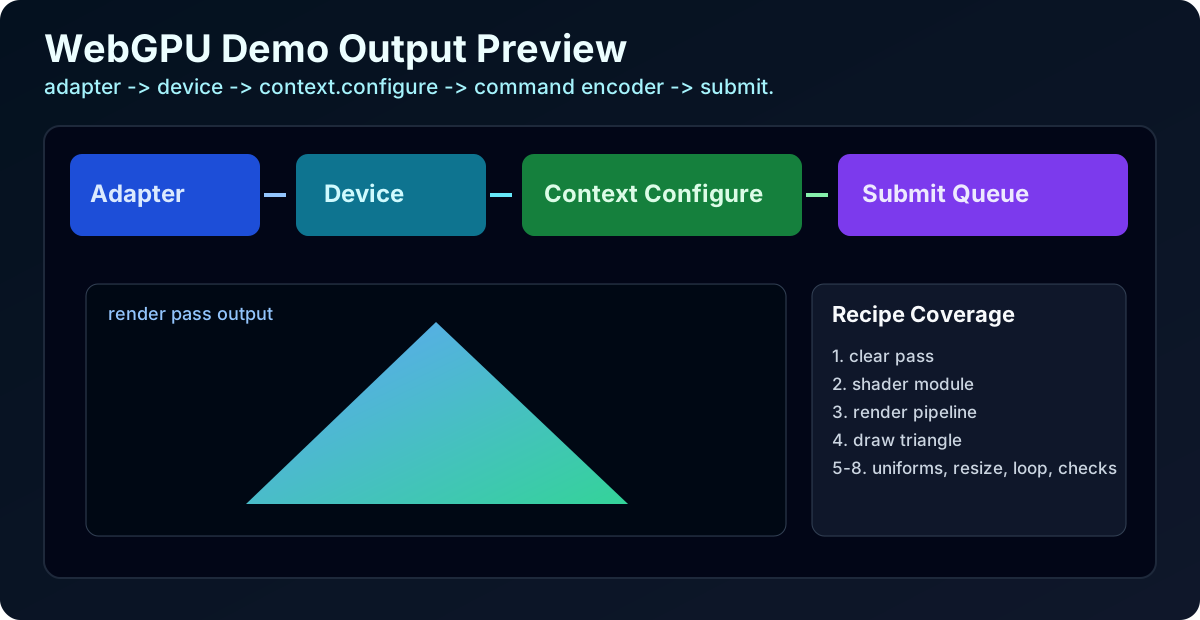
Expected flow: adapter and device initialization, context configuration, render pass setup, then triangle output with updates from uniforms and animation loops.
Shared setup
import type { GPUAdapter, GPUDevice } from '@nativescript/canvas';
import { Screen } from '@nativescript/core';

let canvas;
let device: GPUDevice;
let context;
let format;

export async function canvasReady(args) {
  canvas = args.object;

  const dpr = Screen.mainScreen.scale;
  canvas.width = canvas.clientWidth * dpr;
  canvas.height = canvas.clientHeight * dpr;

  const adapter: GPUAdapter = (await navigator.gpu.requestAdapter()) as never;
  device = (await adapter.requestDevice()) as never;

  context = canvas.getContext('webgpu');
  format = navigator.gpu.getPreferredCanvasFormat();

  context.configure({
    device,
    format,
    alphaMode: 'premultiplied',
  });
}
1. Clear pass only
const encoder = device.createCommandEncoder();

const pass = encoder.beginRenderPass({
  colorAttachments: [
    {
      view: context.getCurrentTexture().createView(),
      clearValue: { r: 0.08, g: 0.1, b: 0.15, a: 1 },
      loadOp: 'clear',
      storeOp: 'store',
    },
  ],
});

pass.end();
device.queue.submit([encoder.finish()]);
Live demo:
Demo is hidden by default. Click Show demo to render this recipe.
2. Create a shader module (WGSL)
const shader = device.createShaderModule({
  code: `
    @vertex
    fn vs_main(@builtin(vertex_index) vertexIndex: u32) -> @builtin(position) vec4f {
      var pos = array<vec2f, 3>(
        vec2f(0.0, 0.5),
        vec2f(-0.5, -0.5),
        vec2f(0.5, -0.5)
      );
      return vec4f(pos[vertexIndex], 0.0, 1.0);
    }

    @fragment
    fn fs_main() -> @location(0) vec4f {
      return vec4f(0.15, 0.75, 0.65, 1.0);
    }
  `,
});
3. Create render pipeline
const pipeline = device.createRenderPipeline({
  layout: 'auto',
  vertex: {
    module: shader,
    entryPoint: 'vs_main',
  },
  fragment: {
    module: shader,
    entryPoint: 'fs_main',
    targets: [{ format }],
  },
  primitive: {
    topology: 'triangle-list',
  },
});
4. Draw a triangle
const encoder = device.createCommandEncoder();

const pass = encoder.beginRenderPass({
  colorAttachments: [
    {
      view: context.getCurrentTexture().createView(),
      clearValue: { r: 0.02, g: 0.04, b: 0.08, a: 1 },
      loadOp: 'clear',
      storeOp: 'store',
    },
  ],
});

pass.setPipeline(pipeline);
pass.draw(3, 1, 0, 0);
pass.end();

device.queue.submit([encoder.finish()]);
Live demo:
Demo is hidden by default. Click Show demo to render this recipe.
5. Uniform buffer update pattern
const uniformBuffer = device.createBuffer({
  size: 64,
  usage: GPUBufferUsage.UNIFORM | GPUBufferUsage.COPY_DST,
});

const mvp = new Float32Array(16);
// Fill with your transform matrix values

device.queue.writeBuffer(uniformBuffer, 0, mvp.buffer, mvp.byteOffset, mvp.byteLength);
6. Reconfigure on resize
function resizeWebGPU() {
  const dpr = Screen.mainScreen.scale;
  canvas.width = canvas.clientWidth * dpr;
  canvas.height = canvas.clientHeight * dpr;

  context.configure({
    device,
    format,
    alphaMode: 'premultiplied',
  });
}
7. Animation render loop
let running = true;

function frame() {
  if (!running) return;

  const encoder = device.createCommandEncoder();
  const pass = encoder.beginRenderPass({
    colorAttachments: [
      {
        view: context.getCurrentTexture().createView(),
        clearValue: { r: Math.random() * 0.1, g: 0.06, b: 0.12, a: 1 },
        loadOp: 'clear',
        storeOp: 'store',
      },
    ],
  });

  pass.setPipeline(pipeline);
  pass.draw(3, 1, 0, 0);
  pass.end();

  device.queue.submit([encoder.finish()]);
  setTimeout(frame, 16);
}

frame();
Live demo:
Demo is hidden by default. Click Show demo to render this recipe.
8. Capability checks
const adapter = await navigator.gpu.requestAdapter();
if (!adapter) {
  throw new Error('WebGPU adapter not available');
}

const device = await adapter.requestDevice();
console.log('device ready', !!device);
9. Depth attachments
Give load and store ops for each aspect your depth format actually has. A depth-only format such as depth24plus takes only the depth ops:
const depthTexture = device.createTexture({
  size: [canvas.width, canvas.height],
  format: 'depth24plus',
  usage: GPUTextureUsage.RENDER_ATTACHMENT,
});

const pass = encoder.beginRenderPass({
  colorAttachments: [/* ... */],
  depthStencilAttachment: {
    view: depthTexture.createView(),
    depthClearValue: 1.0,
    depthLoadOp: 'clear',
    depthStoreOp: 'store',
    // no stencil ops: depth24plus has no stencil aspect
  },
});
A format with stencil, such as depth24plus-stencil8, also needs stencilLoadOp and stencilStoreOp. This follows the spec. Before 3.0, missing ops were filled in with 'load' and 'store', which broke depth-only formats.
10. Video frames as a texture
copyExternalImageToTexture accepts a video directly. When the destination texture includes RENDER_ATTACHMENT in its usage, the decoded frame is copied on the GPU, with no trip through CPU memory.
import '@nativescript/canvas-polyfill'; // document.createElement('video'), backed by canvas-media

const video = document.createElement('video');
video.loop = true;
video.muted = true;
video.src = '~/assets/video.mp4';
await video.play();

const [w, h] = [640, 360];
const videoTexture = device.createTexture({
  size: [w, h, 1],
  format: 'rgba8unorm',
  usage:
    GPUTextureUsage.TEXTURE_BINDING |
    GPUTextureUsage.COPY_DST |
    GPUTextureUsage.RENDER_ATTACHMENT, // enables the zero-copy path
});

function frame() {
  device.queue.copyExternalImageToTexture({ source: video }, { texture: videoTexture }, [w, h, 1]);
  // Bind videoTexture.createView() as a regular texture_2d<f32> and draw.
  requestAnimationFrame(frame);
}
requestAnimationFrame(frame);@group(0) @binding(0) var samp: sampler;
@group(0) @binding(1) var tex: texture_2d<f32>;
@fragment
fn fs_main(@location(0) uv: vec2f) -> @location(0) vec4f {
return textureSample(tex, samp, uv);
}- iOS, tvOS, visionOS (Metal): the frame is imported on the GPU.
- Android: this works only on API 29+, and only when the video decoder outputs RGB buffers. Most hardware decoders output YCbCr, and on those devices video frames cannot reach a WebGPU texture yet. On Android, use WebGL
texImage2Dor 2DdrawImagefor video. - Keep a single long-lived texture. If no new frame has been decoded since the last copy, the copy is skipped and the texture keeps the previous frame.
- To sample the video directly in a shader, without a copy, use
importExternalTexture.
11. Sampling video with importExternalTexture
importExternalTexture wraps the current video frame as a GPUExternalTexture. Your shader samples the frame directly, with no intermediate copy or texture.
const pipeline = device.createRenderPipeline({
  layout: 'auto',
  vertex: { module: device.createShaderModule({ code: quadWGSL }) },
  fragment: {
    module: device.createShaderModule({ code: videoWGSL }),
    targets: [{ format }],
  },
});

const sampler = device.createSampler({ magFilter: 'linear', minFilter: 'linear' });

function frame() {
  const bindGroup = device.createBindGroup({
    layout: pipeline.getBindGroupLayout(0),
    entries: [
      { binding: 1, resource: sampler },
      { binding: 2, resource: device.importExternalTexture({ source: video }) },
    ],
  });
  // Encode a render pass that uses bindGroup, then submit.
  requestAnimationFrame(frame);
}
requestAnimationFrame(frame);@group(0) @binding(1) var mySampler: sampler;
@group(0) @binding(2) var myTexture: texture_external;
@fragment
fn main(@location(0) uv: vec2f) -> @location(0) vec4f {
return textureSampleBaseClampToEdge(myTexture, mySampler, uv);
}- Import every frame, as on the web. If the decoder has no new frame yet, you get the previous one back.
sourcemust be a video element, either fromdocument.createElement('video')or a canvas-mediaVideo.VideoFramesources are not supported.- Supported on iOS, tvOS and visionOS. On Android it throws
NotSupportedError; use recipe 10 or WebGL there instead. - Once
await video.play()resolves, a frame is available, as on the web. Calling it beforeplay()has resolved, or before the video has loaded, throwsInvalidStateError.